We’ve rounded up some of the more simple homeschool science experiments, which are super fun and introduce children to important scientific concepts.
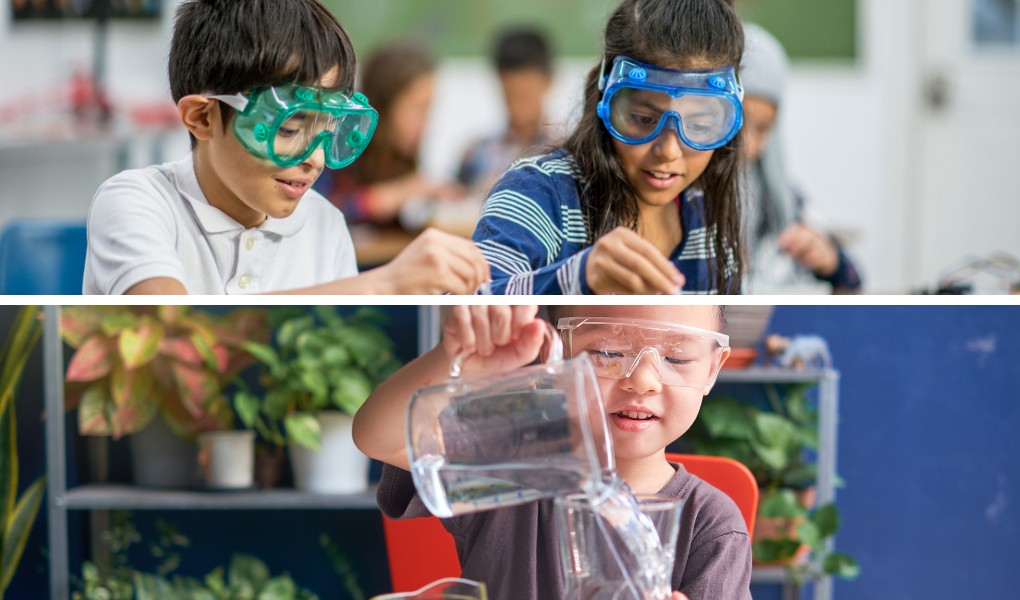
We’ve rounded up some of the more simple homeschool science experiments, which are super fun and introduce children to important scientific concepts.
1. Baking Soda and Vinegar Volcano
Concepts:
Chemical reactions, acids and bases
Materials:
- Baking soda (sodium bicarbonate)
- Vinegar (acetic acid)
- Soap/washing-up liquid (optional, for extra bubbles)
- Red food colouring (optional, for a lava-like effect)
- A small container (like a plastic cup, bottle, or canister)
- Clay, playdough, or paper-mâché (to shape the volcano)
Instructions:
- Prepare the volcano structure:
- Mold clay or playdough around the small container to create the shape of a volcano, leaving the top of the container open.
- Alternatively, you can use a paper-mâché technique to build the volcano around the container using newspaper and a glue-water mixture. Let it dry before proceeding.
- Add the baking soda:
- Place the volcano on a tray or in a pan to catch any overflow.
- Add about 2-3 tablespoons of baking soda into the container inside the volcano.
- Add optional ingredients:
- If desired, add a few drops of red food colouring and a squirt of washing-up liquid to the container for a more dramatic eruption.
- Create the eruption:
- Slowly pour vinegar into the container, about half a cup or more, and step back to watch the reaction.
- The mixture will foam and overflow, simulating a volcanic eruption.
Science Explanation:
The reaction between baking soda (a base) and vinegar (an acid) produces carbon dioxide gas. This gas forms bubbles, which cause the foamy eruption that resembles lava flowing from a volcano. The soap enhances the bubbling effect, making the eruption more impressive.
You could also:
- Experiment with quantities: Try using different amounts of baking soda and vinegar to see how the size of the eruption changes.
- Eruption speed: Test how the temperature of the vinegar (warm vs. cold) affects the speed and intensity of the eruption.
- Colour mixing: Use multiple colours of food colouring in different parts of the volcano to see how the colours mix during the eruption.
2. Rainbow in a Glass
Concepts:
Density, solubility, layering of liquids
Materials:
- Honey
- Corn syrup
- Washing-up liquid (coloured)
- Water
- Vegetable oil
- Rubbing alcohol (coloured with food dye)
- A tall, clear glass or jar
- Food colouring (optional, to dye the liquids)
Instructions:
- Prepare the liquids:
- If the liquids are not already coloured, add a few drops of food colouring to each. Use different colours for each layer to create a rainbow effect.
- Stir each liquid thoroughly to ensure the colour is evenly distributed.
- Layer the liquids:
- Carefully pour the honey into the glass first. This will be the bottom layer because it is the densest.
- Slowly add the corn syrup on top of the honey. To prevent mixing, pour it gently down the side of the glass or over the back of a spoon.
- Next, add the washing-up liquid, followed by the water. Again, pour slowly to keep the layers distinct.
- Pour the vegetable oil on top of the water.
- Finally, add the rubbing alcohol, which should sit on top of the oil.
- Observe the rainbow:
- You should see distinct layers of liquid in different colours, creating a rainbow effect.
Science Explanation:
Each liquid has a different density, which means the mass of the liquid molecules is packed differently in a given volume. The denser liquids (like honey) will stay at the bottom, while the less dense liquids (like rubbing alcohol) float on top. This experiment visually demonstrates how liquids of different densities behave when combined.
You could also:
- Add objects: Drop small objects like a grape, coin, or plastic bead into the glass to see which layer they float in. This helps reinforce the concept of density.
- Shake it up: Carefully mix the layers by stirring and observe how long it takes for them to separate again. This can lead to discussions about solubility and miscibility.
3. Magic Milk
Concepts:
Surface tension, chemical reactions
Materials:
- Whole milk (full-fat milk works best)
- Food colouring
- Washing-up liquid
- A shallow dish or plate
- Cotton swabs or toothpicks
Instructions:
- Prepare the milk:
- Pour enough milk into the shallow dish to cover the bottom. You want a layer of milk that’s about 1/4 inch deep.
- Add food colouring:
- Add several drops of different colours of food colouring to the milk. Place the drops near each other in the centre of the dish for the most dramatic effect.
- Add the soap:
- Dip a cotton swab or toothpick into the washing-up liquid, then touch it to the surface of the milk in the centre where the food colouring is.
- Watch the magic:
- The colours will begin to swirl and move in all directions, creating beautiful patterns and mixing in unexpected ways.
Science Explanation:
Milk contains fat molecules, and the washing-up liquid breaks down these fat molecules, disrupting the surface tension of the milk. As the soap spreads out from the point of contact, it pushes the food colouring around, creating swirling patterns. This demonstrates the interaction between soap and fat and the concept of surface tension.
You could also:
- Different milks: Try the experiment with different types of milk (skim, 2%, whole, and cream) and observe how the fat content affects the reaction.
- Repeat the experiment: After the colours have settled, try adding more washing-up liquid in different spots and observe how the patterns continue to change.
- Discuss emulsions: Talk about how soap works to clean greasy dishes by breaking down fats, similar to what happens in this experiment.
4. DIY Lava Lamp
Concepts:
Density, immiscibility of liquids, chemical reactions
Materials:
- A clear bottle or jar
- Water
- Vegetable oil
- Food coloring
- Alka-Seltzer tablets
Instructions:
- Fill the bottle:
- Fill the bottle about 1/4 full with water. You can add food colouring to the water if you like.
- Add the oil:
- Slowly pour the vegetable oil into the bottle, filling it almost to the top. The oil will float on top of the water because it’s less dense.
- Add the Alka-Seltzer:
- Break an Alka-Seltzer tablet into pieces and drop one piece into the bottle. The tablet will sink to the bottom, reacting with the water and creating bubbles.
- Watch the lava lamp effect:
- As the tablet dissolves, it will produce carbon dioxide gas. The gas forms bubbles that rise through the oil, carrying some of the coloured water with them. When the bubbles reach the top, they pop, and the water sinks back down, creating a mesmerising lava lamp effect.
Science Explanation:
The oil and water do not mix because oil is non-polar, and water is polar. When the Alka-Seltzer reacts with the water, it produces carbon dioxide gas. The gas bubbles rise through the oil, and as they pop at the surface, the denser water droplets fall back down, creating the lava lamp effect. This experiment illustrates the principles of density and the immiscibility of liquids.
You could also:
- Experiment with other liquids: Try using other types of oil, like baby oil or mineral oil, and see if the effect changes.
- Multiple tablets: Add multiple Alka-Seltzer tablets to see if it speeds up the reaction or creates more vigorous bubbles.
- Colour layering: Use different food colours in separate batches to layer colours in the bottle for a more complex visual effect.
5. Static Electricity Butterfly
Concepts:
Static electricity, forces of attraction and repulsion
Materials:
- Tissue paper or a lightweight material
- Construction paper
- A balloon
- Scissors
- Tape
Instructions:
- Create the butterfly:
- Cut a butterfly shape out of the tissue paper. You can fold the tissue paper in half and cut both wings at once for symmetry.
- Tape the body of the butterfly to a piece of construction paper, leaving the wings free to move.
- Charge the balloon:
- Blow up a balloon and rub it vigorously on your hair or a wool sweater. This builds up static electricity by transferring electrons from your hair to the balloon.
- Animate the butterfly:
- Slowly bring the charged balloon near the butterfly’s wings without touching them. The wings should lift and move toward the balloon, as if the butterfly is flapping.
Science Explanation:
Rubbing the balloon on your hair causes it to gain extra electrons, giving it a negative charge. The tissue paper butterfly has a neutral charge. When the negatively charged balloon comes close to the neutral tissue paper, the opposite charges attract, causing the wings to move. This experiment demonstrates the forces of attraction and repulsion in static electricity.
You could also:
- Repel objects: After the balloon attracts the wings, try to see if it will repel other objects, like small bits of paper or a stream of water from a faucet.
- Static electricity hunt: Charge the balloon and see what other lightweight objects it can attract around the house (e.g., paper scraps, hair, small pieces of foil).
- Balloon games: Try using the balloon to pick up small items, or stick it to a wall and see how long it stays up.
6. Invisible Ink
Concepts:
Oxidation, chemical reactions
Materials:
- Lemon juice or milk
- A cotton swab or paintbrush
- White paper
- A heat source (like a lamp, hair dryer, or iron)
Instructions:
- Write the secret message:
- Dip a cotton swab or paintbrush into the lemon juice or milk and write a message or draw a picture on a piece of white paper. The message will be invisible when it dries.
- Reveal the message:
- After the paper has dried completely, use a heat source to reveal the message. You can hold the paper close to a light bulb, use a hair dryer, or carefully iron the paper (with adult supervision).
- As the paper heats up, the invisible ink will start to brown, revealing the hidden message.
Science Explanation:
When the lemon juice or milk is applied to the paper, it is initially invisible. However, when heated, the organic compounds in the juice or milk oxidise and turn brown, making the message visible. This experiment introduces the concepts of oxidation and chemical reactions, where heat causes certain materials to change colour.
You could also:
- Other “inks”: Experiment with different household substances, like vinegar, onion juice, or baking soda solution, to see if they also work as invisible ink.
- Try cold methods: Some invisible inks can be revealed by other methods, like applying iodine to the paper or using a black light. Experiment with these techniques to explore different types of reactions.
- Secret messages game: Write and decode secret messages with friends or family, and discuss how each “ink” works.
7. Walking Water Experiment
Concepts:
Capillary action, colour mixing, cohesion, adhesion
Materials:
- 3 clear cups or jars
- Water
- Food colouring (red, blue, yellow)
- Paper towels
Instructions:
- Set up the cups:
- Arrange three cups in a row. Fill the two outer cups with water, leaving the middle cup empty.
- Colour the water:
- Add a few drops of red food colouring to one of the cups with water and blue or yellow food colouring to the other. The middle cup should remain empty.
- Prepare the paper towels:
- Fold two paper towels into strips that are about an inch wide. Place one end of each strip in the coloured water and the other end in the empty cup.
- Watch the water walk:
- Over the next few hours, the water will travel up the paper towels and into the empty cup. The colours will mix in the middle cup, creating a new colour (like purple if you use red and blue).
Science Explanation:
The water moves through the paper towels due to capillary action, a process where water molecules are attracted to the fibres of the paper towel (adhesion) and to each other (cohesion). As the water is pulled upward, it moves into the empty cup, bringing the colour along with it. This experiment demonstrates how plants draw water from the soil through their roots using capillary action.
You could also:
- More colours: Try using additional cups with different colours to create a rainbow effect.
- Vary the distance: Experiment with cups placed at different distances to see how it affects the speed of the water transfer.
- Plant connections: Relate the experiment to how water travels from the roots to the leaves in plants, and discuss how this is essential for plant survival.
8. Homemade Slime
Concepts:
Polymers, states of matter, viscosity
Materials:
- White glue (PVA glue)
- Baking soda
- Contact lens solution (containing boric acid)
- Food colouring (optional)
- Mixing bowl and spoon
Instructions:
- Prepare the glue mixture:
- In a mixing bowl, pour in about 1/2 cup of white glue.
- If you want coloured slime, add a few drops of food colouring to the glue and stir well.
- Add baking soda:
- Add 1/2 teaspoon of baking soda to the glue and mix thoroughly. The baking soda helps to firm up the slime.
- Add the contact lens solution:
- Slowly add 1 tablespoon of contact lens solution to the glue mixture while stirring. The mixture will start to come together and form slime.
- If the slime is too sticky, add a bit more contact lens solution.
- Knead the slime:
- Once the slime starts to form, take it out of the bowl and knead it with your hands until it becomes smooth and stretchy.
Science Explanation:
The glue contains polyvinyl acetate (PVA), a polymer that gives it a sticky, thick texture. When you add the baking soda and contact lens solution (which contains borate ions), the PVA molecules cross-link, turning the liquid glue into a flexible, rubbery substance known as slime. This process demonstrates the concept of polymerisation, where small molecules (monomers) link together to form larger chains or networks.
You could also:
- Add-ins: Mix in glitter, beads, or small foam balls to create textured slime.
- Different consistencies: Adjust the amount of contact lens solution to make the slime stretchier or firmer. Experiment with different ratios to see how the properties change.
- Slime variations: Try making fluffy slime by adding shaving cream, or glow-in-the-dark slime by using glow-in-the-dark paint instead of food colouring.
9. Egg Drop Challenge
Concepts:
Physics, engineering, gravity, impact force
Materials:
- Raw eggs
- Various household materials (e.g., straws, tape, cotton balls, cardboard, plastic bags, rubber bands, etc.)
- A drop zone (a staircase, ladder, or balcony)
Instructions:
- Set the challenge:
- Explain to your child that their goal is to design a device that will protect a raw egg from breaking when dropped from a certain height.
- Gather materials:
- Provide a variety of household materials that can be used to cushion or protect the egg. Encourage creativity and allow them to think outside the box.
- Design and build:
- Let your child brainstorm and sketch out their design first, then gather materials and build their egg protection device. They can use straws, tape, cotton balls, or any other materials available.
- Test the device:
- Drop the egg in its protective device from a predetermined height (e.g., the top of a staircase or balcony). Inspect the egg after the drop to see if it survived the fall.
- Iterate and improve:
- If the egg breaks, encourage your child to modify their design and try again. Discuss what worked and what didn’t, and how they can improve their design.
Science Explanation:
This experiment introduces the principles of gravity and impact force. When an egg is dropped, gravity pulls it towards the ground, and when it hits the ground, it experiences a force. The challenge is to design a device that can absorb this force and distribute it in a way that prevents the egg from cracking. This activity encourages problem-solving and an understanding of basic physics and engineering concepts.
You could also:
- Multiple heights: Test the egg protection devices from different heights to see how they perform at various levels.
- Time the fall: Use a stopwatch to measure how long it takes for the egg to hit the ground and discuss how speed and impact force are related.
- Group challenge: If you have multiple children or friends involved, turn it into a competition to see whose design works best. Discuss the pros and cons of each design and why some worked better than others.
That’s our round-up of super simple and fun homeschool science activities. Let us know which one is your favourite!
m@liberated
Want more from Liberated to Learn?
Subscribe to stay updated about new posts, resources and giveaways!

