If you’re looking to keep your child engaged and make learning fun, try these 16 homeschool craft ideas that kids actually learn from!

Who doesn’t love some good homeschool craft ideas? When you’re homeschooling, doing crafts is a memorable and creative way for your children to learn about different concepts and interests. And they’re great for hands-on learners too!
If you’re looking to keep your child engaged and make learning fun, try these 16 homeschool craft ideas that kids actually learn from! You can tailor these projects to various subjects and they’re suitable for different age groups, so get stuck in!

1. Paper Plate Life Cycle Crafts
Subject: Science (Biology)
This is a great craft for visual learners. Learning about life cycles, such as a butterfly life cycle, couldn’t be easier!
By using paper plates as the base, your child can divide the plate into segments to represent each stage in a creature’s life cycle, such as the transformation from an egg to fully grown in insects or frogs.
You could also add different textures like cotton balls for eggs or tissue paper for wings, which helps to bring the life cycle to life.
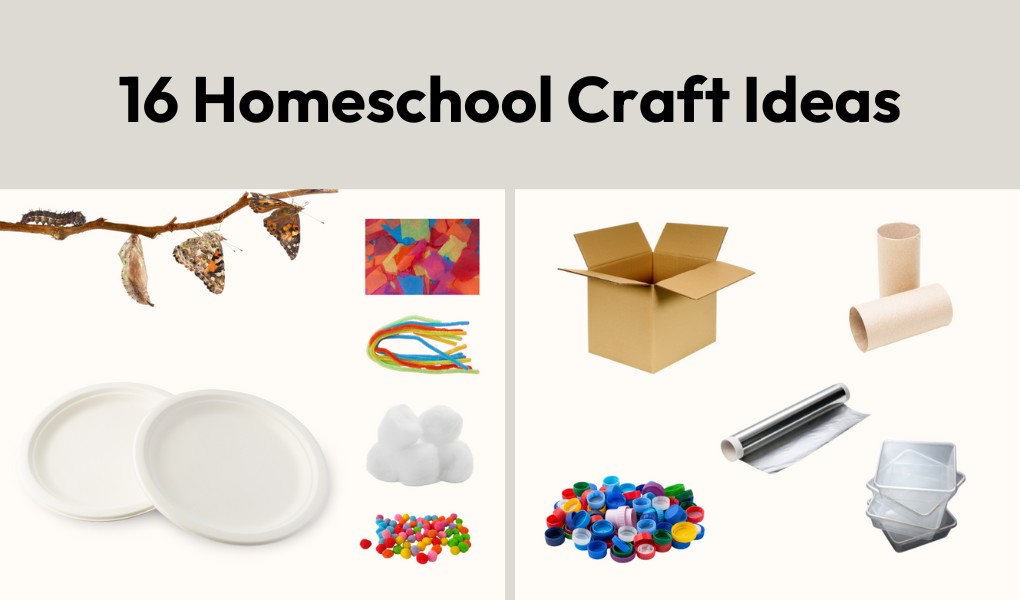
Materials: Paper plates, glue, scissors, markers, tissue paper, pipe cleaners, pom-poms, cotton balls
Instructions:
- Divide the paper plate into four segments by drawing a line vertical and horizontal.
- For each section, illustrate a stage in the creature’s life (e.g., egg, larva, butterfly).
- Add 3D elements—cotton balls for eggs, pipe cleaners for caterpillars, and tissue paper for butterfly wings.
- Label each section with a description of the life stage.
Skills developed: Fine motor skills, sequencing, biological understanding, and labelling.
Example: For a butterfly life cycle, the first section can represent eggs with cotton balls, the second a pipe cleaner caterpillar, the third a tissue paper chrysalis, and the last a beautiful butterfly using coloured paper and pom-poms.

2. Historical Dioramas
Subject: History & Social Studies
Make learning history much more interesting by making historical dioramas which replicate a historical event or era. See which period of history your child is interested in learning about and recreate it in 3D! You could choose a civilisation, a specific battle, or a significant historical landmark.
Materials: Shoeboxes, clay or sand, construction paper, paint, cardboard, markers, glue, mini-figurines, popsicle sticks
Instructions:
- Pick a historical event or period (e.g., Ancient Egypt, the Medieval era).
- Use a shoebox as the base and paint or colour the background to match the scene (e.g., a desert for Egypt or a battlefield for war).
- Build structures or terrain using clay, cardboard, and other craft supplies. For example, you could create a pyramid or a medieval castle.
- Create small figures from clay or use toy figurines to represent people or animals.
- Add labels or a written description explaining the event or time period depicted.
Skills developed: Research, historical analysis, spatial awareness, creativity, and storytelling.
Example: For an Ancient Rome diorama, you can recreate the Roman Forum using cardboard for the columns and figures made of clay to represent historical figures like Julius Caesar or Roman soldiers.

3. DIY Solar Oven
Subject: Science (Physics)
Building a solar oven is an exciting way to teach your child about renewable energy, thermodynamics, and sustainability. Great for all the science lovers out there! This project demonstrates how solar power can be harnessed to cook food.
Materials: Pizza box, aluminium foil, plastic wrap, black construction paper, clear tape, a ruler, a thermometer, scissors
Instructions:
- Line the inside of the pizza box with black construction paper (to absorb heat).
- Cover the flap of the pizza box with aluminium foil (to reflect sunlight into the oven).
- Stretch plastic wrap across the opening of the pizza box (to trap heat).
- Place food, like marshmellows, inside the oven and place it outside in direct sunlight.
- Use a thermometer to measure the temperature increase inside the oven over time.
- Wait and see what happens!
Skills developed: Engineering, problem-solving, understanding renewable energy, and scientific inquiry.
Example: After the project, challenge your child to think about what modifications, like adding more reflectors or using darker paper, could make the oven more efficient. Try out their ideas together and compare the results.

4. Nature Journals and Leaf Prints
Subject: Art & Science (Botany)
A nature journal isn’t just something that looks pretty — it’s a great way to combine art, science, and outdoor exploration. By collecting leaves and flowers, your child can learn about different plant species and their anatomy whilst also expressing their creative side.
Materials: Leaves, flowers, paint, paper, coloured pencils, glue, guide to plants
Instructions:
- Take a nature walk and collect leaves, flowers, or small branches.
- Press the plants into the pages of a notebook or use them to make leaf prints by dipping them in paint and pressing them onto the paper.
- Label the plants and write descriptions about where they were found, what type of plant they are, and any interesting facts.
- Add drawings or observations about how plants grow, their ecosystems, or their adaptations.
Skills Developed: Observation, artistic expression, understanding of botany, and descriptive writing.
Example: For an autumn nature journal, have your child collect various types of colourful leaves, create leaf prints using paint, and research the differences between deciduous and evergreen trees.

5. Roman Mosaics
Subject: History (Ancient Rome) & Art
Studying ancient cultures is even more engaging when children get to experience some of the art forms from those periods. Roman mosaics were a significant part of ancient Roman decoration, and recreating this form of art will give your child a great insight into historical craftsmanship.
Materials: Small coloured tiles, coloured paper, construction paper, glue, scissors
Instructions:
- Research Roman mosaics and observe how they were made using small, coloured tiles arranged into intricate patterns or pictures.
- Cut coloured paper into small squares to mimic tiles (or use actual mosaic tiles if you’d like).
- On a larger sheet of paper, sketch a simple design related to the Romans.
- Glue the small paper squares or tiles onto the design, leaving small spaces between each piece to replicate the mosaic style.
- Allow the mosaic to dry and discuss the cultural significance of mosaics in Roman homes and public buildings.
Skills Developed: Artistic design, pattern recognition, historical knowledge, and attention to detail.
Example: Create a mosaic depicting a Roman god or goddess, or design a simple geometric pattern similar to those found in Roman bathhouses.
Similar to mosaics, you could also try making a stained glass window, either with coloured paper or cellophane.

6. Story Stones
Subject: Creative Writing
Story stones are a fun way to inspire storytelling. These are small stones painted with pictures or symbols that can be used as prompts to create stories. This craft is perfect for imaginative souls and for developing creative writing skills.
Materials: Small smooth stones, acrylic paint or paint pens, sealant (optional), a container for the stones
Instructions:
- Collect smooth stones or purchase small craft stones.
- Paint simple images on each stone (e.g., animals, trees, stars, characters, and objects like boats or houses).
- Once the stones are dry, mix them up in a jar or container.
- Have your child randomly pick several stones and use them to tell or write a story based on the images they’ve chosen.
Skills Developed: Creativity, storytelling, and fine motor skills.
You can expand this activity by asking your child to write the full story or act it out.

7. Geometric String Art
Subject: Maths & Art
Maths doesn’t have to stay in textbooks—it can come to life through creative crafts like string art. Simply by using nails and string, your child can create geometric designs while learning about shapes, angles, and symmetry.
Materials: Wooden board, nails, string or embroidery thread, hammer, ruler, pencil
Instructions:
- Measure and mark the board with dots to create a geometric shape like a square, triangle, or circle.
- Hammer nails into the board at regular intervals along the shape’s outline.
- Tie the string to one nail and begin wrapping it around other nails in various patterns to create interesting geometric designs.
- Experiment with different shapes and string placements to explore symmetry, angles, and tessellations.
Skills Developed: Geometry, spatial reasoning, pattern recognition, and motor skills.
Example: Create a complex design such as a star inside a circle or a pattern resembling a flower.

8. Salt Dough Maps
Subject: Geography & History
Salt dough is a great material to create anything 3D, so why not incorporate geography or history into it and build a 3D map or historical landmark. This will help your child to understand topographical features like mountains, rivers, and valleys, and can be tied to historical lessons about specific regions or events.
Materials: Salt dough (flour, salt, water), cardboard, paint, paintbrushes
Instructions:
- Mix the salt dough (2 parts flour, 1 part salt, and water to the desired consistency) and mould it onto a piece of cardboard to form the shape of a country, continent, or even the entire globe.
- Shape geographical features such as mountains, rivers, lakes, and valleys.
- Once the dough has dried, paint the different landforms and label key areas (e.g., capital cities, regions, and rivers).
- Tie the project to history by identifying regions where important events occurred. Or tie it to science by exploring how geography affects ecosystems and climates.
Skills Developed: Geography, history, spatial awareness, topography, and mapping skills.

9. DIY Water Cycle in a Bag
Subject: Science
The water cycle is a fundamental concept in Earth science, and creating a visual, hands-on representation will help your child understand it more deeply. This craft shows how water evaporates, condenses, and precipitates, all within a simple, sealable plastic bag!
Materials: Resealable plastic bags, water, blue food colouring, permanent marker, tape
Instructions:
- Draw the water cycle on the outside of a plastic bag using a permanent marker. Include key features such as the sun, clouds, and raindrops.
- Fill the bag with a small amount of water, and a few drops of blue food colouring for effect.
- Seal the bag and tape it to a sunny window.
- Over time, the water will evaporate and condense, forming “clouds” (condensation) on the inside of the bag. Eventually, water droplets will run down the sides of the bag, simulating rainfall (precipitation).
Skills Developed: Understanding the water cycle, observational skills, and environmental science concepts.
Example: Have your child track the amount of time it takes for each stage of the water cycle to appear in the bag and compare it to real-world weather patterns.

10. Homemade Bird Feeders
Subject: Science (Zoology) & Environmental Studies
Encourage your child’s love of nature by crafting homemade bird feeders. This project introduces the importance of supporting local wildlife, while also getting kids involved in outdoor observation.
Materials: Pine cones, peanut butter (or an allergy-friendly substitute like lard), birdseed, string
Instructions:
- Tie a piece of string to the top of a pine cone so that you can hang it up later.
- Cover the pine cone in peanut butter or lard, ensuring it gets into all the crevices.
- Roll the sticky pine cone in birdseed until it is completely coated.
- Hang the bird feeder outside and observe which species of birds visit.
Skills Developed: Understanding of ecosystems, animal behaviour, observation, and environmental responsibility.
Example: Keep a journal of bird species that visit your feeder. Have your child research and draw each bird, learning more about their diet and habitat.

11. Timeline Collage
Subject: History & Social Studies
Timeline collages are both creative and educational. They can help with understanding the sequence of historical events and how different eras relate to one another. This craft is perfect for visual learners and grasping chronology.
Materials: Poster board, magazines, glue, markers, scissors, coloured paper
Instructions:
- Pick a historical topic—like the rise and fall of ancient civilizations.
- Draw a horizontal or vertical line across the poster board and label key dates.
- Cut out images, words, or symbols from magazines or print materials that represent different time periods or events.
- Glue the images onto the timeline in chronological order, and label each event or era with dates and short descriptions.
Skills Developed: Chronological understanding, historical analysis, research skills, and creativity.
Example: Create a timeline of Ancient Egyptian history, including the construction of the pyramids, the reign of different pharaohs, and the development of hieroglyphics.
12. Crystal Growing Experiment
Subject: Science (Chemistry)
Growing crystals is a fantastic way to introduce your child to basic chemistry concepts. Plus, the finished product can be stunning!
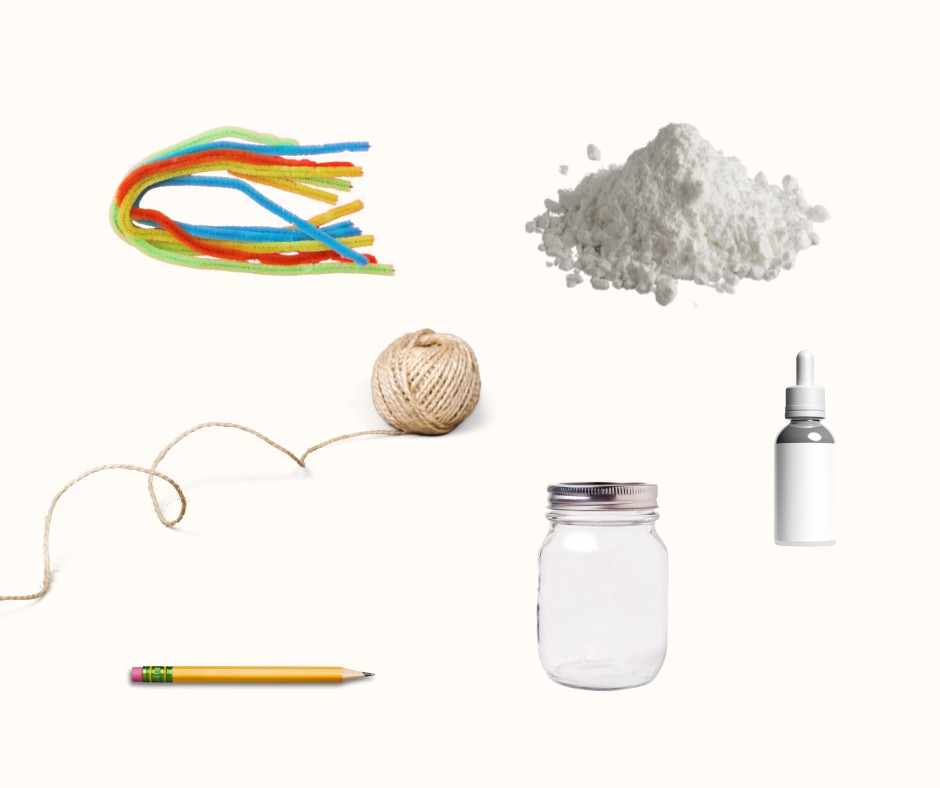
Materials: Borax powder, water, food colouring, pipe cleaners, string, pencils, jars
Instructions:
- Twist pipe cleaners into fun shapes—like stars, snowflakes, or spirals.
- Tie a piece of string to each pipe cleaner and the other end to a pencil.
- Heat water to boiling and stir in Borax until it no longer dissolves (creating a saturated solution).
- Add food colouring for a colourful effect, then submerge the pipe cleaner shapes in the Borax solution, resting the pencil across the top of the jar.
- Leave overnight, and watch as crystals begin to form around the pipe cleaners!
Skills Developed: Chemistry understanding, scientific inquiry, observation, and patience.
Example: Use this project to explain the concept of saturation and how temperature affects solubility. You can also discuss how crystals form in nature, like in caves or snowflakes.

13. 3D Geometric Shapes
Subject: Maths (Geometry)
Creating 3D geometric shapes out of common household materials is a great way to visualise and understand geometric properties. This project reinforces maths lessons on shapes, angles, and symmetry.
Materials: Toothpicks, marshmallows (or clay), tape
Instructions:
- Using toothpicks and marshmallows, or even clay, construct basic 3D shapes like cubes, pyramids, and tetrahedrons.
- Count the edges, faces, and vertices for each shape, and compare the properties.
- Try building more complex structures like a dodecahedron or experimenting with symmetrical designs.
Skills Developed: Spatial reasoning, geometry, engineering, and problem-solving.
Example: Use this activity to discuss the difference between 2D and 3D shapes, explaining how the number of faces, edges, and vertices changes when moving into three dimensions.

14. Homemade Slime or Oobleck
Subject: Science (Physics and Chemistry)
Making slime or Oobleck (a non-Newtonian fluid) is a fun, hands-on way for your child to learn about states of matter and viscosity. It’s a messy but educational craft that they will love.
Materials for Slime: Glue, baking soda, saline solution, food colouring, glitter (optional)
Materials for Oobleck: Cornstarch, water, food colouring (optional)
Instructions (Slime):
- Mix glue and a few drops of food colouring in a bowl.
- Add a teaspoon of baking soda and stir well.
- Slowly add saline solution, stirring until the slime begins to form. Knead it with your hands to get the desired consistency.
Instructions (Oobleck):
- Mix 2 parts cornstarch to 1 part water in a bowl.
- Add food colouring if desired.
- Observe how the mixture behaves—solid under pressure but liquid when relaxed.
Skills Developed: Understanding states of matter, viscosity, and chemical reactions.
Example: Use Oobleck to teach the difference between solids, liquids, and non-Newtonian fluids. You could encourage your child to record their observations as they play with the substance.

15. Recycled Robots
Subject: Engineering & Environmental Science
Teaching children about recycling while encouraging engineering skills is the perfect combination for this project. Create robots or other imaginative inventions simply by using recyclable materials from around the house.
Materials: Cardboard boxes, toilet paper rolls, bottle caps, plastic containers, aluminium foil, glue, paint
Instructions:
- Gather recyclable materials like boxes, bottle caps, and plastic containers.
- Plan a robot design using the materials available. Consider adding movable arms or legs using string or toilet paper rolls.
- Glue the pieces together and decorate the robot with paint, foil, or stickers.
- Discuss the importance of recycling and how the robot’s parts could otherwise contribute to waste.
Skills Developed: Engineering, environmental awareness, creativity, and spatial reasoning.

16. Homemade Paper
Subject: Art & Environmental Studies
Exploring the art of papermaking couldn’t be easier—all you need is recycled materials, and it’s a great way of teaching your child about sustainability.
Materials: Old newspapers, a blender, water, a picture frame (or mesh screen), sponge, towel
Instructions:
- Tear the old newspapers into small pieces and soak them in water for a few hours.
- Blend the soaked paper with water until it forms a pulp.
- Pour the pulp onto a mesh screen or frame and press it down to form a flat sheet.
- Use a sponge to press out excess water, then lay the paper on a towel to dry.
- Once dry, your homemade paper can be used for writing or drawing.
Skills Developed: Understanding recycling processes, patience, creativity, and fine motor skills.
Example: Try adding flower petals, leaves, or coloured tissue paper to the pulp for a more decorative effect, discussing how different materials influence the paper’s texture and appearance.
We hope you enjoy trying out these homeschool craft ideas! Let us know which one is your child’s favourite!

m@liberated
I am a writer and home educator, lover of fantasy books and all things creative! I'm either learning and making discoveries with my daughter, reading, writing or eating chocolate!
Want more from Liberated to Learn?
Subscribe to stay updated about new posts, resources and giveaways!


